 |
| AccuProducts Bench Plates |
Does your shop have a bench plate? A Bench Plate is a precision ground aluminum
plate that allows us to level and parallel a cutting unit. Why is this important? Doing this allows the rollers and the cutting
edge to be on the same plain. If they
are not parallel when you make passes with the mower you will be introducing a
mismatch. If two cutting units side by
side have a mismatch you can easily have a surface that will effect ball
movement. The lower you cut, the more
important it is.
Have you ever rolled a cutting unit on concrete and noticed
it rocked? This is the easiest way to
tell if a cutting units rollers are not parallel. Now with the newer styles of cutting units
that hold their position much better you need to have a bench plate to truly
tell where each unit is at.
How is it used?
***Important to remember***
This is assuming you have
properly ground the reel first and there is no taper in the reelstock. Grind your reels first then put them on the
bench plate for the best results
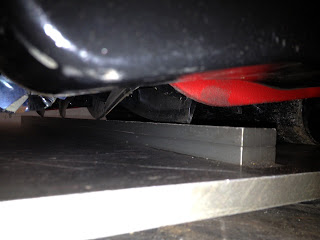
With the bedknife removed you place the cutting unit on the
plate. You have the cutting edge of the
reel on the raised surface and put slight pressure on the rear roller. Try to slide a feeler gage or piece of paper
under the rear roller. If the paper fits
on one side or another the roller is not parallel to the cutting edge. If you
are setting up a Toro DPA cutting unit you can loosen the side plate bolts
slightly then allow the frame to settle into proper position. For older cutting units you may have to bend
the frame slightly to achieve this.
 |
| Cutting edge on raised surface |
 |
| sliding paper under roller |
 |
| Side plate bolts |
Other things to keep in mind
Rear Roller Adjustment Kit-
This kit (part # 114-4630) allows you to adjust the roller on a DPA cutting unit. Manufacturing tolerances are very tight and simply loosing the side plates is often enough. If it is not and you are cutting at very low height of cuts. I would suggest you install this kit on your greensmowers. Is is an eccentric for one side of the roller and allows roller adjustment. One kit per cutting unit is needed.
 |
| Kickstand #119-8010-03 |
The Kickstand-
If you are setting up a DPA cutting unit, you should be
using this make sure you do not adjust the bedknife contact while the reels are
sitting on the adjustment nuts. Failure
to do this will often result in the contact amount changing once the reel is
flipped back down.
 |
| the Cutoff Bar mounting holes are slotted for adjustment |
The Cutoff Bar-
This small piece of metal is adjustable based upon your
conditions. The gap between this plate
and the cutting edge determine the airflow and clipping dispersion of the
cutting unit. This should be adjusted as
your reels wear. If you find your
clippings are not making it into the baskets properly, adjust this bar.
Bearings-
This is the most critical part of any reel, and I don’t think
they get near enough attention. The bearings in the reel and rollers determine
if we can achieve proper HOC and keep it.
If you have run out of .010 in both your front and rear roller, you
could be seeing a +-.020 (not to mention the reel bearing) Try to cut a green
below .120 with that much variance and you will notice very quickly. You can easily determine bearing run out with
a dial indicator, or an AccuGage.


