Monday, October 8, 2012

Do you need an adjustment?

Aeration season is full of planning and preparation. When it comes to your equipment, you may check the operation, order tines, etc, but have you ever read your operators manual for adjustments?


Toro Procore 648

The Toro Procore 648 is a great machine, the efficiency of this machine is incredible. Within the operators manual (page 43) is a procedure for Resetting the Ground Following System.  This adjustment is often overlooked on this machine, and does need to be adjusted from time to time.

The ground following system uses the depth handle adjustment, and the position of the turf guards to determine the depth of the coring head.  If this is not properly adjusted you may not be getting the proper depth.

How to make the adjustment-

Insert a 5/16 bolt through the hole in the turf guard holding bracket and the hole in the frame.  This holds the turf guard in the proper position.

Hole in frame for bolt

Turf Guard frame with bolt in place

Move the depth adjustment handle to the "H" position.

Depth adjustment handle 

Connect a multi-meter (set on Ohms) to the outboard ball switch. (I like to set it to beep when there is no resistance)

Connect to switch closest to rod

Loosen the jam nuts on the top and bottom joints of the adjustment rod.

Adjust the rod until the ball switch circuit closes. (zero resistance) Tighten the jam nuts and remove the 5/16 bolt.  The Ground Following System has been reset.

Jam nuts are LH & RH threads to make adjustment easier


Setting the depth manually- 


If you would like, you can set the depth of the Procore manually.  You do this by flipping the Ground Following System switch to the off position.  (This is the switch with the bolt through it)


Ground Following Switch has a bolt to keep in position
You will then set the depth with these spacers.  When you press the switch to activate the coring head it will drop to the stops on the frame.  The spacers determine the depth, just like the height of cut on many of our rotary mowers.  *When you switch back, make sure all the spacers are back on top or, maximum depth will not be achieved.

Manual depth spacers
If you are ever in the process of aerating and you do not appear to be getting consistent depth with the holes.  First adjust the Ground Following System.  If that does not address the issue, flip the switch and try it in manual.


Tuesday, September 18, 2012

In the Red Zone

No, I am not talking about Football, I am talking about machines running hot.  The red zone for operating temp is never a good thing.  I take a fair amount of questions about cooling systems running "hot" or just under the red zone.  I will try to explain how the cooling systems operate and how we check them in our shop.

First off I should state that the electrical system on Toro equipment is designed to help identify an overheat situation.  This helps us by either shutting the machine down, (or in more recently built machines) shut the PTO system off first, then if the temp continues to rise, shut the machine down.  These systems are in place to save the engine from severe damage that can occur from an overheat situation.  I caution people to never disable this function.

So what do you do if your machine is overheating?  Virtually every time I see this issue it is related to one thing.  Not enough airflow through the radiator.  Either the fan is not spinning fast enough, or the radiator is plugged.  This is how we diagnose this-

1.Check the belt tension

We test the belt tension with a 13mm wrench and put it on a fan mounting bolt. We then try to turn it clockwise.  Can you turn the pulley with minimal force?  If so, the belt is too loose causing the fan to not spin fast enough.

2. Check the radiator for airflow blockage

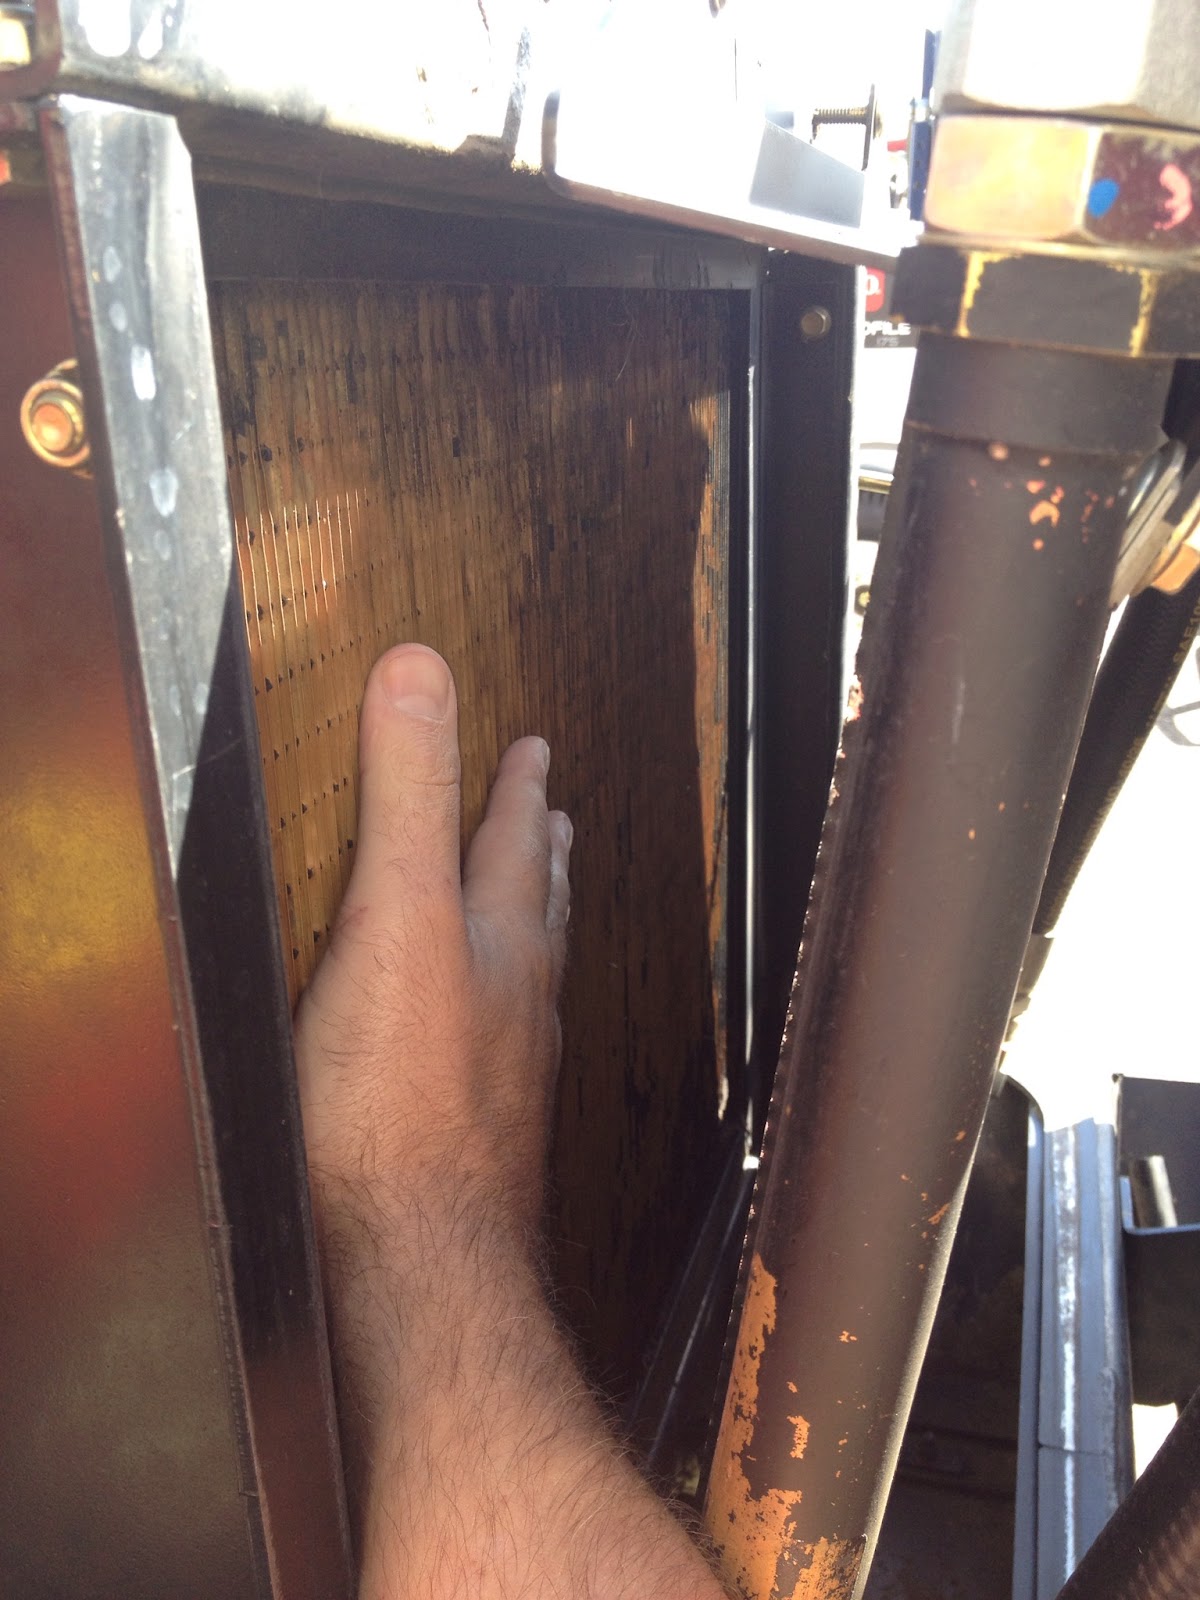
Without proper airflow over the radiator the is no chance the cooling system will operate properly.  The easiest way to tell if you are getting airflow through the radiator is to check it with your hand.  when I perform this test I open the hood, move the oil cooler out of the way and place my hand next to the radiator.  *Do this when the machine is cold to insure the radiator is not to hot to touch!  Move your hand around the radiator.  Do you feel good flow through ALL areas of the radiator?  Too often the corners or the bottom third are plugged solid.  People blow out the center and feel they cleaned it, but they have missed portions.  The other biggest problem I see is people using water to clean radiators.  This will cause the bottom of the radiator to become completely plugged.  It creates a concrete like surface that can not be blown out with air once it drys.  We often have to completely remove the radiator to properly clean it at this point.


3. Check the Fan Clutch

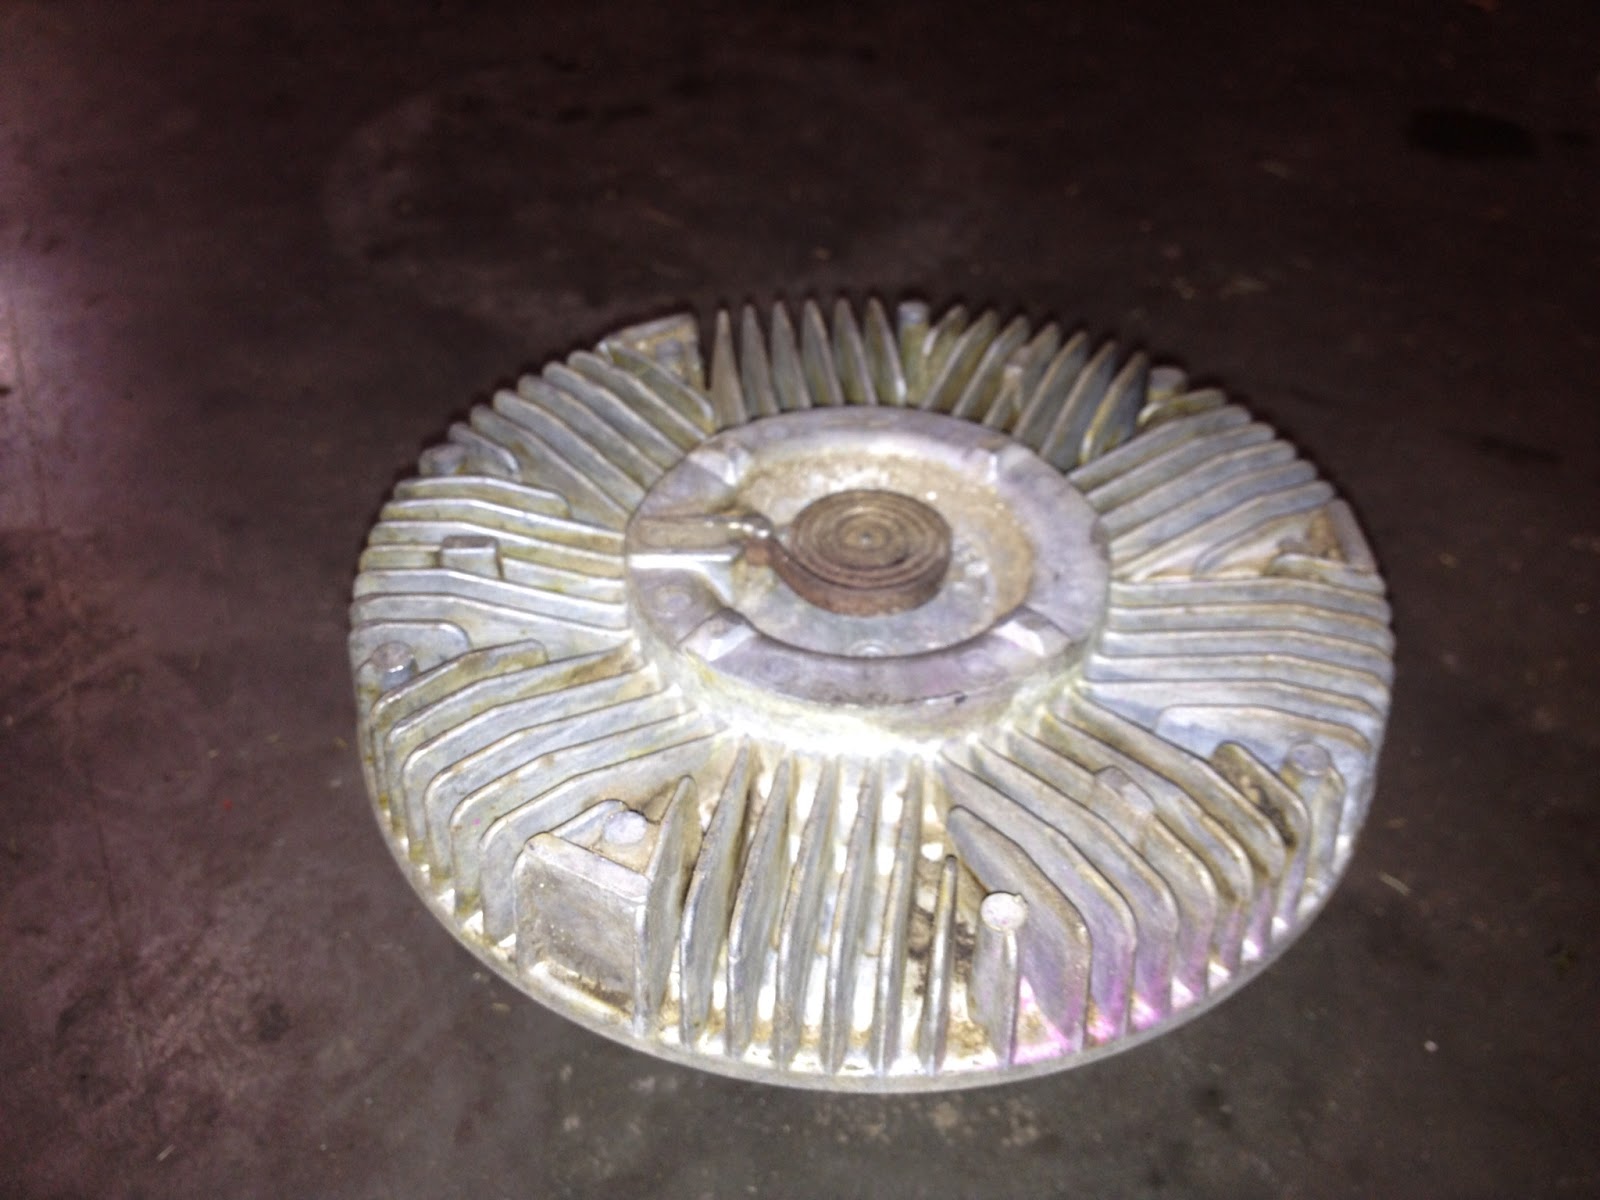
The fan clutch determines how fast the fan will spin.  This is the aluminium piece that the fan is mounted to. There is fluid inside the clutch that stiffens up when the clutch warms up.  So when the machine is cold there should be little resistance in the fan clutch.  When warm, the fan should be harder to spin. If there is no change, the fan clutch is bad, and you are not spinning the fan fast enough.


*If the spring steel coil is missing from the front of the clutch, the clutch needs to be replaced 


3.1 The Direct Drive Kit (Toro #117-5665)

If your fan clutch is bad (or you do not feel you are getting enough airflow) there is a Direct Drive fan clutch replacement kit.  This kit was designed for machines with a cab & AC that put a heavier load on the engine.  This kit is a aluminium block that removes the clutch and bolts the fan right to the pulley.  There are some downsides to this approach though.  The increased fan speed will increase machine noise. (Hearing protection is recommended) You may also need more frequent radiator cleanings and may influence the fan belt life.


Check the seal of the rear screen

Once you have determined what the root cause of your overheating problem is, another thing to watch for is how your hood seals against the radiator when it is closed.  If there is not a proper seal, grass and other debris will plug the radiator much faster.  Look at the weather stripping around the rear screen, does it make a good seal?  If you have a 4500-D or a 4700-D the rear screen swings out of the way.  Over time this screen can get bent and may need to be adjusted to get a proper seal.


Of course there can be other factors the come into play with an overheating concern, but from my experience these are the most common causes.

Jim


Wednesday, September 12, 2012

What's that black box for?


That black box that has been collecting dust on your shelf is an ACE Diagnostic Display Tool (Toro Part# 85-4750).  This (in my opinion) is the most underutilized tool in an Equipment Managers tool box.   

ACE Tool 

The ACE Tool first made its appearance in 1989 with Toro's 580-D.  Toro needed a way to troubleshoot the "brain" of the tractor. This tool allows us to test all of our input switches, the controller, the wiring, and the outputs, all in a matter of seconds without ever leaving the seat or pulling out an electrical schematic.  Sound like it may be time to blow the dust off of it yet?

Lets take a scenario in which the tractor will not crank.  The first thing I would do is find the loopback connector and plug in the ACE tool.  Now I can test the most common of issues.  Does the neutral switch work?  Move the pedal and watch the light go on and off, yep the neutral switch works.  Does the seat switch work?  Sit down and check the light, yep that one works. Turn the key to crank, and no light? You have just narrowed the issue down to the key switch or the wiring to the controller.


Loopback Connector 

This is something that can be done in the field without any other special tools, or test equipment. Of course there are times where you will need a good multimeter and a schematic, but why jump to that if there is an easier way?

Those of you familiar with the tool may have noticed I have not mentioned the overlay that is used with the ACE tool.  This is a plastic sheet that tells you what each light means when it goes off and on.  It is specific to each model number.  For the example above, I did not need the overlay.  all I was checking was inputs.  When we get a little deeper into troubleshooting, we will want to test what the controller is telling the machine to do and that is when knowing what each light means will help us.

*Do not let not having the correct overlay keep you from using the tool!

ACE Overlay

The best advice I can give someone trying to use the ACE Tool for the first time, is just plug it in and try it.  Once the lights come on, start flipping switches (inputs) and see what the tool does.  You will get the hang of it very quickly.  Press the toggle input-output button and find out what the controller is telling the machine to do.  Do you having a flashing output light? there is a fault in that circuit, check that output.

Not all of Toro's machines have the ability to use the ACE Tool.  Some of the machines that work with this are- 580-D, Reelmaster Fairway units, & Groundsmaster 4000 series units with switches to lift the decks.

*As a side note- If you have a leak detector on your fairway unit.  You need to be using this tool when you fill your machines hydraulic tank to ensure it works properly.

Some of the other units use a Standard Control Module with built in diagnostic lights.  I will cover this in an upcoming post.  


Tuesday, September 11, 2012

Welcome to MTI Service


In my first post I would like to introduce myself and give you an idea on what to expect going forward with this blog. 

I am Jim King and I am the Service Manager at MTI Distributing in Brooklyn Center, MN.  We are the Toro Distributor for MN, ND, and Portions of WI, SD, IA, IL, & MO.  I will be focusing on mainly Commercial Toro Equipment and Service.  Prior to coming to MTI, I was an Assistant Superintendent / Mechanic at several courses in MN and WI.  While I love what I do here, I often miss the turf side and appreciate when I get the opportunity to get back outside.

Each post I will try to bring you helpful tips about your Toro equipment, and try to give you things to look for based on the season.  When I first started working on equipment I felt there were too many secrets.  The people around me felt I had to “learn the hard way”.  I never understood this; I want to share what I know to help others in the industry.  Along the way I will try to add pictures and videos to help better explain the details of each post.

So welcome to the MTI Service Blog.  I look forward to sharing more in the future.

Jim King 


*The views in this Blog are my own and do not reflect the views of MTI or Toro in any way.